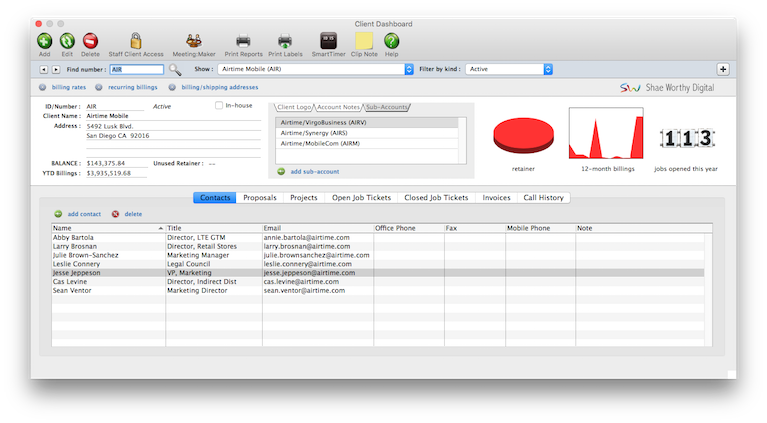
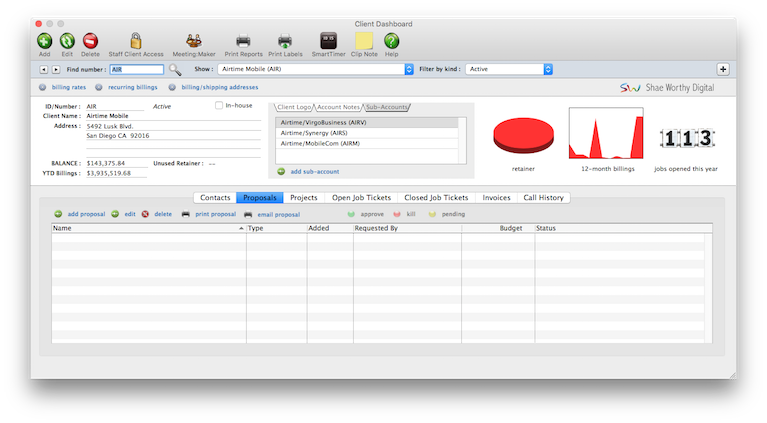
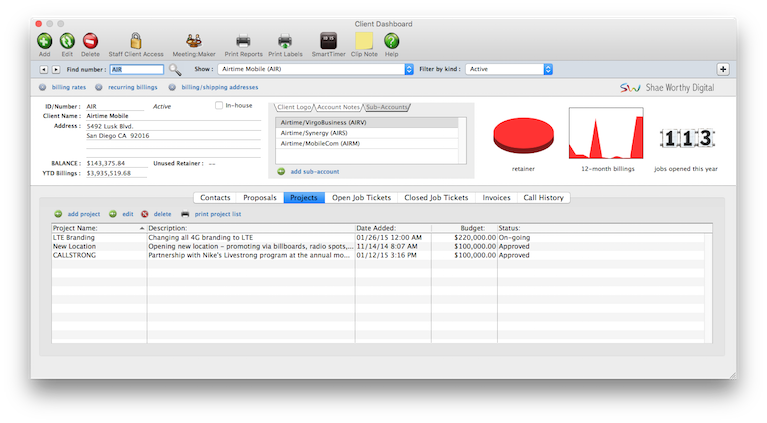
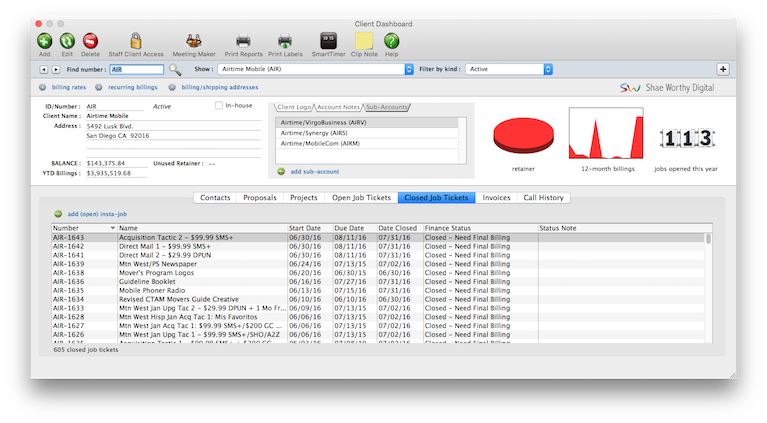
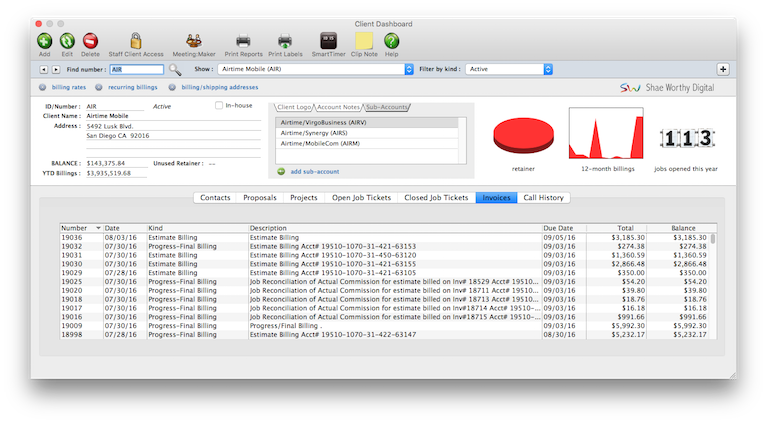
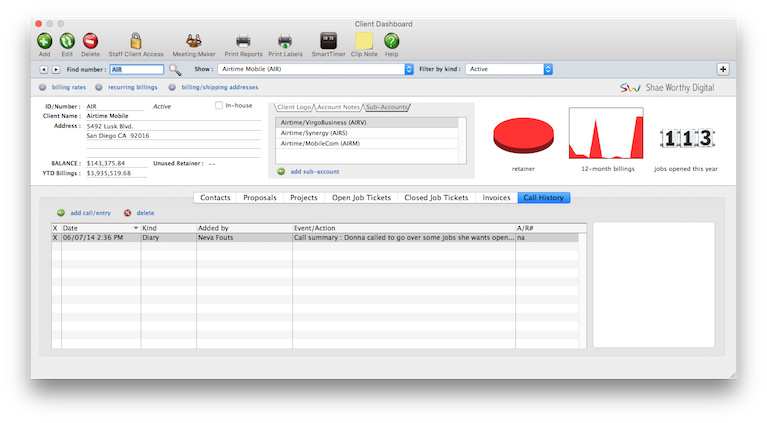
For better job tracking, you can have many clients from the same organization. A large corporate client, for example, might have 100 different departments or contacts who initiate jobs. Anyone who authorizes work can be added as a separate client account. When jobs are billed, the work from several different clients can be combined on one invoice -- and even billed to an entirely different client account.
Costs, billings, and the unbilled amount are tracked on the client’s job(s). Work in Progress reports are printed to subtotal by client, or printed for just one client or job. The unbilled amount on the client’s job is updated whenever costs or billings are posted. So you can analyze the client’s costs and billings anytime during the month.
Clients can be billed automatically, based on the costs on the job. When the cost is posted, both the cost and the billable amounts update the job ticket. So when it’s time to bill, the total unbilled amount -- or any part of it -- is quickly and accurately invoiced. Many different billing types and options are available to customize invoices for different clients.
Outstanding balances are tracked by client, so you’ll always know just who owes you money -- and for how long -- by printing client account aging reports from Snapshots. You can choose to age each invoice and subtotal by client, or just show totals for each client.
To find a client
Clients can be found in several ways: by account number; by organization name; by cost center; by sequence; or, by browsing through the Clients file.
When the Clients window is opened, the last-used client is displayed automatically.
1 Choose My > My Clients.
The Clients window opens, displaying the previously viewed client.
2 Enter a client number in the Find Number field, then click the magnifying glass icon.
You can find clients by organization name, cost center, or by sequence (i.e., the order in which clients were added). Click the previous and next buttons to browse clients sequentially. You can alternately view a client by choosing it from the Show drop-down menu.
Clients are the most essential part of your Clients & Profits database for a simple reason: A job ticket can't be opened without one.
Clients can be added with as much or as little information as you want. Only the client number and organization name are required to save a new client. Everything else can be added later. The client number will be used to identify the client throughout Clients & Profits. A short and meaningful three-letter code is most commonly used so that it is easier to enter and to remember, but up to ten letters can be used. The client's organization name will be the one the client sees on printed reports, invoices, and estimates.
Once the client is added and saved, it can be seen and used immediately by other users. The client’s account information can be changed anytime. New clients can also be added while you’re working elsewhere using the client’s List Report.
To add a client
1 Choose My > My Clients.
2 Click the add button, or choose Edit > Add New Client.
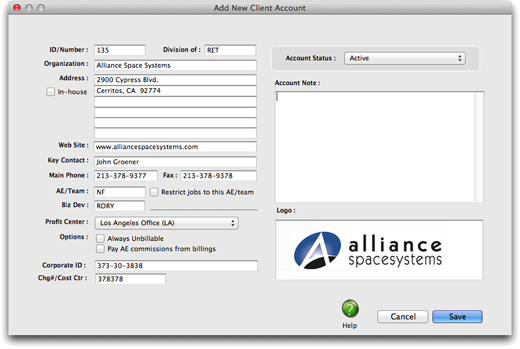
The Add Client Account window opens.
 3
3 Enter the new client's details.
Client Number. It should be a unique number that will be used to identify the client in Clients & Profits. The customizable number should be no more than ten digits long. Numbers and letters can be used in any combination.
Division. When a client is assigned to a division, it can be combined with other clients belonging to the same division on reports, estimates, invoices, and client statements. The client code entered here is the master client account and the one who's organization name will appear on printed reports, etc.
Organization. This is the client's organization name and address. They will appear on printed estimates and invoices. A separate billing address can be added in the Billing Information window if it differs from the client's mailing address.
In-house Clients. If a client is added for time tracking purposes only, they can be marked as an in-house client. Their time won't appear on Client P&L statements.
Key Contact. This is the person most resposible for approving the client's jobs. It is copied to new job's automatically.
AE/Team. This is the account executive or team assigned to the client. Various job reports can be printed by AE/Team.
Charge Number/Cost Center. Useful for corporate clients, an optional charge number/cost center number can be entered for the client's internal billing purposes. It appears on estimates and invoices.
Profit Center. An optional profit center can be assigned to the client to group this client with others in the same business unit. If used, only tasks with the same profit center assigned can be added to this client's job.
Web Site. For easy reference, the client's web site address can be entered here.
Always Unbillable. Clients that will never be billed for their job costs can be marked as always unbillable. This is useful for pro-bono clients or in-house clients.
Contacts. Additional client contacts can be entered with their work phone number and work e-mail address.
Status. Use the status pull-down menu to choose the client's status. Clients can be selected as an active, inactive, hot lead, prospect, curious, or cold call client. Inactive clients don't appear on the Client Lookup List and can't be used when adding new job tickets. The client window, Client Lookup List, and client labels can all be printed for one client status or all.
Account Notes. Use this field to enter any important information about the client, such as billing instructions or preferences.
4 Click Save.
The Client Account Information window contains details about an account used for sales, account service, and billing.
The window contains different kinds of information about a client, such as budgets, notes and billing information. The basic name, address, and note is edited in the Clients window.
To edit a client
1 Choose My > My Clients.
2 From the Clients window, find the client account you wish to change.
3 Click the edit button (or choose Edit > Edit > Client).
The Client Account Information window opens.
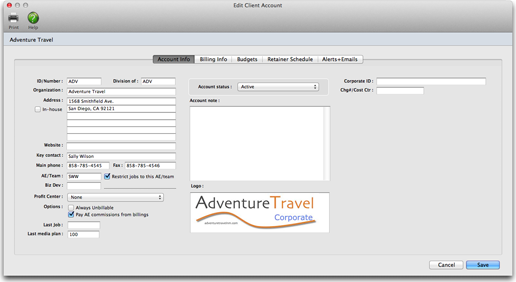
If a client has a balance (or any other activity), its account number can’t be changed. However, the name, address, and contacts can be changed anytime, which only affects new invoices. (The client number can be changed using the Re-number utility, which changes all of the client’s jobs, costs, invoices, and payments.)
4 Make your changes then click OK.
The Account Note field is not edited from this window. To edit the Account Note, from the My Clients window, click the notes link at the bottom of the window.
If a client has a balance, it can’t be deleted. Even if a client has no unpaid balance, it can’t be deleted if it has a job; if so, the job would no longer have a client.
1 From the Clients window, find the client you wish to delete.
2 Click the delete button (or choose Edit > Delete).
The only way to delete a client is to delete its activity. This means long-time clients with closed jobs can’t be deleted until their jobs are purged. It is best to leave the history in your database and instead mark the client as “inactive” by unchecking the Active checkbox.
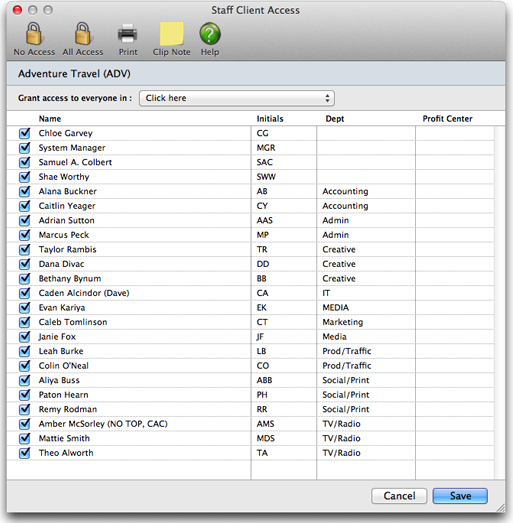
Client/Staff Access Privileges control who can see a client's jobs.
They let certain users see a client’s job tasks, while keeping out other users. If a user is given no access to a client, he or she can’t see the job’s tasks, estimates, costs, or billings. This option lets you define on a client-by-client basis just who can work with certain clients.
The staff access privileges are designed for shops with competitive account teams. In some cases the members of one team should only see their own client’s jobs. For security and accountability reasons, they would be prevented from seeing the jobs for other clients.
Only manager-level users can change a client’s staff access privileges.
Staff access privileges are defined separately for each client. For example, a client that is concerned with security can limit access to their jobs to certain staff members. In this case, you can assure your client that no unauthorized person can see the client’s estimates, costs, or billings for their jobs.
On the other hand, most clients probably assume that everyone in the shop can see their jobs; and that the staff members use a reasonable amount of discretion (i.e., they don’t gossip about a client’s billings outside the company).
Staff access privileges for clients only affect a user’s access to the job’s tasks. Access to other client-related areas in Clients & Profits (which includes most of the database) are not affected by these settings. In most cases, the user’s general, menu, job, cost, and accounting access privileges are the real basis for security in the Clients & Profits database.
Client staff access privileges aren’t foolproof. If they are set up incorrectly, unauthorized staff members could be able to see jobs for the wrong clients. Also, any manager-level user can change these settings. It’s important not to have too many manager-level users, and that senior management regularly review the access privileges for security-aware clients.
When new staff members join the company, be sure to check their access to clients. Also, when a staff member leaves be sure to remove them from their client access privileges by clicking the “no access” checkbox.
To set a client’s staff access privileges
1 From the Client window, find a client.
2 Click the
access button.
The Client/Staff Access Privileges window opens.
 3
3 For every user who shouldn’t see this client’s jobs, check the No Access checkbox.
4 Click Save.
1 Choose My > My Clients.
2 Choose File > Print Client List.
A Client List can also be printed from the Client Lookup List. To print a Client List from the Lookup List, click the Print button. The Client List doesn’t show every bit of account information, simply because there’s too much to print. If you need a special client report with different fields (such as cost center), create a custom report.
1 From the Clients window, find a client account.
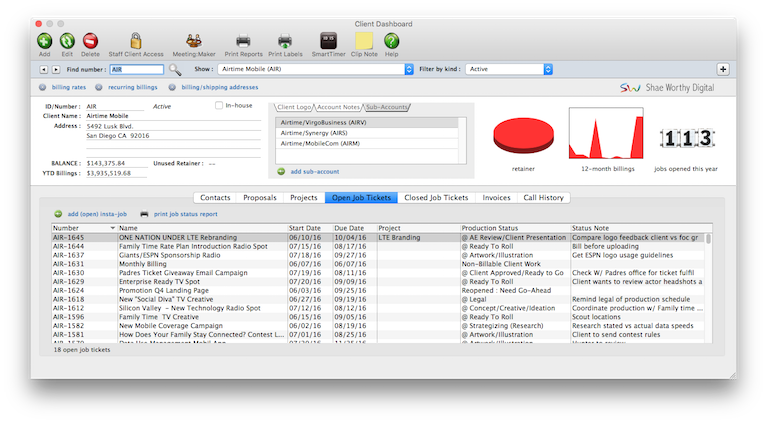
2 Select the Open Job Tickets tab to see all open jobs for this client. Select the Closed Job Tickets tab to see all past jobs for this client.
To view any job open or closed, double click on the job in the list.
You can also open an insta-job for this client at any time using the add (Open) Insta-Job link. With Insta-Job, a job can be opened for any client in seconds. Give the job a name, pick a project and template, then click Save.
1 From the Clients window, click on the Print Labels button.
2 Select the profit center you wish to print labels for, the number of sheets you wish to print, and which type of client you wish to print labels for. You must select at least one of these checkboxes or the labels will not print.
3 Click Print.
Client numbers are very important, since they appear throughout Clients & Profits -- and are used by everyone. There’s a real art to picking the right client codes. You must choose a number that’s easy for everyone to remember, but meaningful enough to distinguish one client from another.
The client number itself can contain up to ten characters, including letters, numbers, and symbols. If your job numbers are set to contain the client number, then your options are much more limited. Since the job number itself can’t exceed ten digits, your client codes must be small if the job number is to contain the year, client, a dash, and the sequential number.
Example: A client code RETAIL won’t work if your jobs are numbered with the year and a dash. If the next job is 1024, the new job number for RETAIL would be 13-RETAIL-1024. Since the job number itself can’t exceed 10 letters, it would appear as 13-RETAIL-1, missing three important digits. So it’s best to use short, simple client numbers (like ABC, RET, FRG, etc.).
If you are worried about users not being able to recognize abbreviated client codes, remember that the client lookup list is available throughout the program. The client lookup list shows both the client code and complete client name.
Each client can setup a schedule of recurring billings for overhead expense items that are paid monthly or quarterly, such as web site hosting
Recurring billings are a real time saver. Once a recurring billing has been added, it can be scheduled to recur for as many times as you like in the upcoming year. Whenever a user opens the Accounts billing window, Clients & Profits will check for the days scheduled recurring billings. If found, the user is prompted to convert them to regular invoices. Once converted, these invoices are like any other and can be proofed and posted.
Recurring billings can also be scheduled for a specific overhead expense billing from the Accounts billing window.
To view a client's recurring billing schedule
1 Choose Setup > Clients, then click on the recurring billings link.
A list of all scheduled recurring billings will appear. Any scheduled item can be edited or deleted from this window.
2 Click the previous and next buttons to select individual recurring billing items in the list.
To add a new recurring billing
1 From the Recurring Billings window, click on the add button.
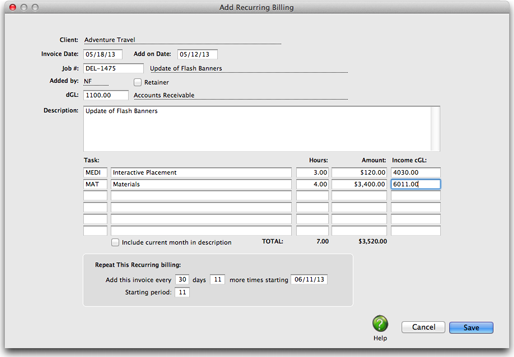
The Add Recurring Billing window opens.
 2
2 Enter the invoice date, date to post, period, cGL, description, and dgl.
The invoice number is added automatically. The date to post is the scheduled date the recurring billing will be converted to an overhead expense billing in the Accounts billing window. The recurring billing can be distributed to up to six different dGL expense accounts.
3 Enter the number of days between which the invoice should be repeated, the number of times the invoice should be repeated, the starting date and period to begin the recurring schedule for this invoice, and the when the recurring billing should be posted.
4 Click Save.
To add additional recurring billings
1 From the Recurring billings window, click once on a scheduled invoice to select it.
2 Click on the repeat button.
3 Enter the number of days between which the invoice should be repeated, the number of times the invoice should be repeated, the starting date and period to begin the recurring schedule for this invoice, and the when the recurring billing should be posted.
4 Click Save.
To edit a recurring billing
1 From the Recurring Billings window, click once on a scheduled invoice to select it.
2 Click the edit button.
The Edit Recurring Billing window opens.
3 Make your changes.
4 Click Save.
Clients & Profits manages different departments and divisions. Both are added as clients into your database. First, the division should be added as a client. Then every department that authorizes jobs should be added as a separate client account. Every client account has its own account number, which you choose.
Departments are associated with the division by the division’s client number. Each department client has a field for division -- this is the division’s account number. Client account agings, client statements, profitability, and productivity reports can be run by division.
New job tickets should be opened for the department client number, not the division. This lets you track jobs by department, which is more informative. When a job is billed, you can change the client number on the invoice to another department -- or the division itself. By changing the invoice’s client number, you’re billing the work to a different client. Regardless of who is billed for the work, the job is updated in the same way. For flexibility, the invoice’s billing address can be changed. Changing the invoice’s billing information only affects the invoice itself.

