Free help: USER GUIDE
Home > Clients & Profits X User Guide > Accounting > Printing 1099s

|
Clients & Profits X Online User Guide |
The vendor 1099 tool prints year-end reports and tax forms based on checks written throughout the year.
Since 1099 forms can be printed
directly from Clients & Profits (using standard
pre-printed forms), your year-end tax reporting
is substantially automated. Checks are selected
for a range of dates (i.e., the date on which you
wrote them, usually January 1 through December
31). Payments are sub-totaled by payee.
Clients & Profits X uses standard laser-compatible 1099 forms. These forms are available from check printers like Deluxe or from most office supply stores.
1099's are printed only for payees that have a vendor account in Setup > Vendors. In "account info" of the payee's vendor account the option "Include checks on year-end 1099 report" must be selected in order to print a 1099 for that vendor. Selecting this option will also set the default for checks added for the vendor to be 1099 reportable. If you add a check for a vendor that is reportable on 1099's and you do not want that check to be reportable you can deselect the 1099 reportable box when adding the check. Only checks marked as reportable for 1099 will be included on the vendor's 1099 form.
If you have a payee who has only overhead and job cost checks and you will need to print a 1099 for that payee you will need to set up a vendor account for the payee in Setup > Vendors. When you setup the vendor account make sure to select the option "Include checks on year-end 1099 report" under options in account info. Once the vendor account is set up you will need to find the checks for that payee in checkbook. Unpost each check and enter the vendor code and tab which will automatically select the 1099 reportable box on the check and will pull in the Federal ID set up in the vendor account. Adding the vendor code on the check will associate it with the vendor account. Then repost the check.
If you will need to produce a 1099 for a vendor that was not set up as reportable for 1099's in their vendor account you will need to select that option in account info of their vendor account. Then find each check for that vendor. For overhead and job cost checks unpost them and add the vendor code to the check and then tab which will update the check as reportable for 1099. On vendor checks unpost them and simply tab out of the vendor field which will automatically update the check as reportable for 1099.
For more information, see the 1099s
FAQ.
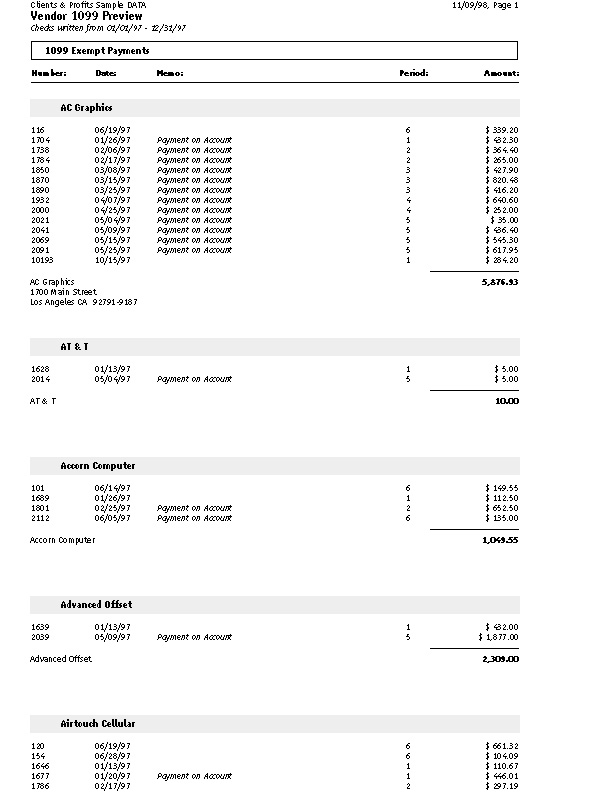
To print a 1099 preview
The 1099
Preview report is designed to help you review the 1099 status of
checks in your system before printing the 1099 forms. Checks listed in
the “1099 Reportable Payments” section will be included on
the printed 1099 forms, if the payee total is over the 1099 payment limit
amount which is specified by the IRS.
1 Choose Accounting > Checkbook.
2 Choose Edit > Check Tools > Print 1099 Report/Forms.
3 Enter the range of dates for which checks should be selected.
The full year’s checks are typically selected for reporting.
4 Enter the payment limit.
The payment limit is specified by the government. Payments to anyone
under this limit won’t be reported on the year-end 1099 reports
or forms.
5 Select the 1099 Preview option, then click Print.
To print 1099 forms
The 1099-MISC forms are the actual year-end tax reporting forms that
you will use for filing. Clients & Profits X uses standard 1099 tax
forms designed for laser printers.
1 From the Checkbook window, choose Edit > Check
Tools > Print 1099 Reports/Forms.
2 Enter the date range and payment limit.
3 Select the 1099-MISC forms report option.
4 Enter the agency’s federal tax and state tax
ID numbers.
5 Click Print.
The 1099 forms are designed especially for most modern ink jet printers, and normally should work without adjustments. If not, the margins can be adjusted by clicking "Change Margins" in the print 1099 reports window. This works exactly like changing the margins when printing checks. Print to plain paper during this trial-and-error process overlaying the test paper on the top of the 1099 forms until the margins are right.
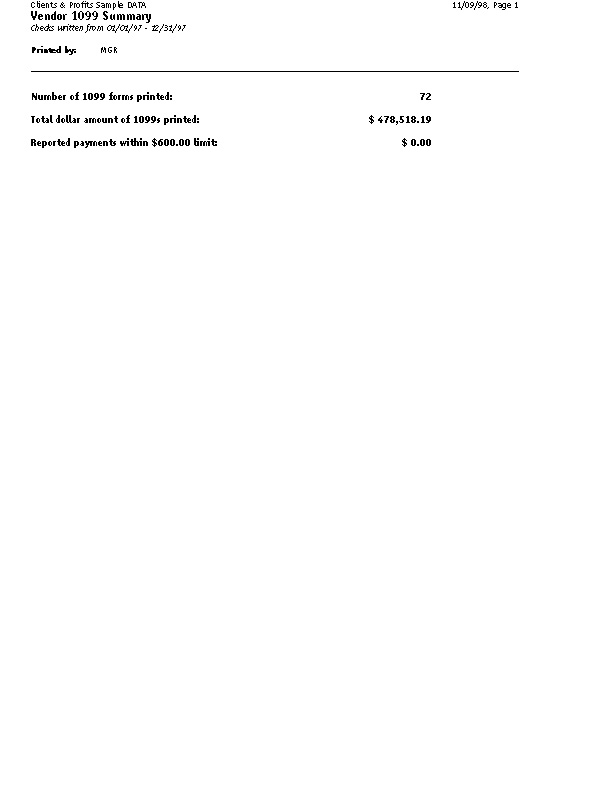
To print a 1099 summary
The 1099
Summary report is designed to assist you in completing the IRS form
for transmittal of the 1099 forms. It gives a count of 1099 forms printed
and a total dollar amount. It also gives the total dollar amount of reportable
payments under the 1099 payment limit.
1 Choose Accounting > Checkbook.
2 Choose Edit > Check Tools > Print 1099 Report/Forms.
3 Enter the range of dates and a payment limit.
4 Select the 1099 Summary report, then click Print.
Customizing 1099 Reports
Customizing 1099 reports (including margins and report parameters) can easily
be done using the Customize Reports utility. Choose Setup > Customize Reports
and select the 1099 report you wish to customize from the list of reports on
the left. For detailed step-by-step instructions on customizing reports, see
the Customize Reports page in this User Guide.
Including a check on the year-end report. When a check is written for a vendor, the vendor’s 1099 information is copied to the check automatically. The year-end 1099 report and forms summarize all checks that have the include on year-end 1099 report option selected. |