Free help: USER GUIDE
Home > Clients & Profits X User Guide > Setup > Edit Vendor Account Information

|
Clients & Profits X Online User Guide |
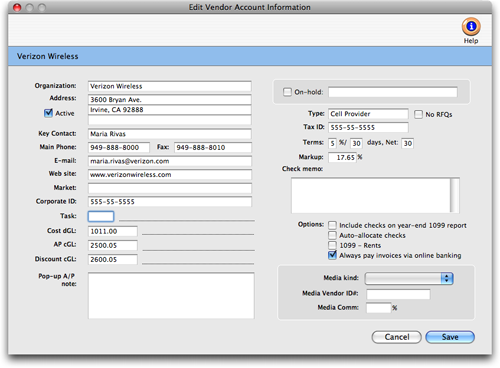
Detailed account information can be easily maintained for each vendor, including task, markup, and notes. This information stays in a central location (your Clients & Profits database) and is generally accessible to everyone.
This makes finding vendor information much faster than using someone's Rolodex cards or filing system. This information can be entered, changed, or deleted, any time.
To edit a vendor
1 Choose Setup > Vendors.
2 From the Vendors window, click the edit button (or choose Edit > Edit Vendor).
The Edit Vendor Account Information window opens, showing the vendor's details.
3 Make your changes.
4 Click Save.
Anything about a vendor -- except its number, account balance, and purchase history -- can be changed at anytime in the edit vendor window.
Editing a vendor number
Editing vendor numbers are not available from the Edit Vendor Account Information window. Instead, they are edited directly from the vendor window itself.
1 From the vendor window, find the vendor you wish to change the number for.
2 Click on the vendor number field. Once you click on this number, the field will go from read-only to an editable field.
3 Change the vendor number to the new number of your choice, then press tab.
If you fail to press tab, Clients & Profits will not save this new vendor number.
|
|
Vendor Addresses
For your convenience, additional addresses can be entered for the vendor. Special addresses can be entered to be used on checks only and/or purchase orders only for the vendor. This is useful for those vendors who have different mailing addresses for things like payments or purchase orders.
To add additional addresses
1 From the Vendor window, click on the addresses link.
2 Enter your addresses.
As a time saver, use the copy button to automatically copy in the vendor's main address. To clear an address, click on the clear button.
3 Click Save.
Learn more:
Vendors
Vendor Diary
Adding Vendors